😊
How to Add Emojis to Photos: Complete Guide
Add expressive emojis to your photos. Perfect for social media and creative projects.
Master the drawing tools to annotate images, highlight details, and add creative touches to your photos online.
You can access the drawing tools in two ways. Inside the main Photo Editor, click on the Draw tab to start drawing on photos in the sidebar (or toolbar on mobile). Alternatively, for quick annotations, visit the dedicated Drawing Tool page.
Select the tool that fits your needs: Line for freehand drawing or straight lines, Arrow for pointing out specific details, Circle for circling areas of interest, or Rectangle for framing content.
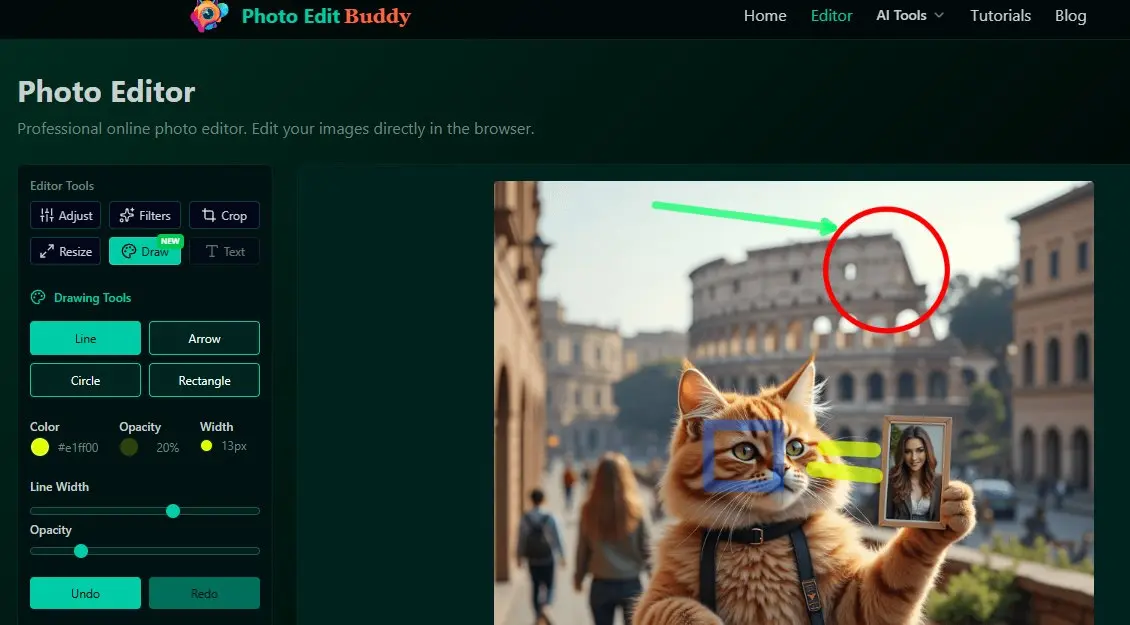
Before you draw, adjust the styling to match your preferences. Click the color picker to choose any Color. detailed controls let you adjust the Opacity (transparency) and Line Width (thickness) of your shapes.
Click and drag on the image to create your shape. If you make a mistake, don't worry! Use the Undo button to remove the last action, or Redo to bring it back. The Clear All (or Reset) button removes all drawings to start fresh.
Once you are happy with your annotations, click the Download button. Your image will be saved with all your drawings merged onto it, perfect for sharing on social media or using in presentations.
Add expressive emojis to your photos. Perfect for social media and creative projects.
Enhance photos with our comprehensive sticker library. Stars, frames, bubbles, and more.
Add stylish text, captions, and watermarks to your photos easily.